


Imagine having all the tools and resources you need to develop your projects efficiently and seamlessly, all in one place. That's exactly what DevPod, the recently launched open-source tool by Loft Labs, offers developers like you. With DevPod, you can create and manage reproducible developer environments, for any infrastructure of your choice and each environment functions as a container which makes it easy to set up and manage across different infrastructures.
GitHub Codespace vs DevPod
GitHub codespaces are already there so why do you need DevPod? Here's the scoop for you -
GitHub codespaces do help you to create and manage developer environments, but they come with a price tag.
On the other hand, DevPod is completely free, obviously as it's open source and gives you full control over your infrastructure. You can run it on any infrastructure, making it a good choice for you. Plus DevPod has a lot of additional features compared to Codespace:
| Feature | DevPod | GitHub Codespace |
| Open Source | Yes | No |
| Cloud provider support | Civo, AWS, GCP, Azure, and more | Github |
| Cost | Free | Paid |
| Infrastructure | Can run on any infrastructure | Hosted on GitHub's infrastructure |
| Control | Full control over infrastructure | Limited control over infrastructure |
| Integration | Integrates with various tools and extensions | Limited integrations |
| Client Side | Yes | No |
DevPod - The development tool that has it all
With DevPod you can goodbye the hassle of setting up and managing your developer environments. It helps you to create and manage reproducible developer environments. You can choose the infrastructure of your choice for different environments. Each environment works as a container, making it easy to set up and manage across different infrastructures.
As DevPod uses a container-based approach it ensures that your environments are consistent, isolated, and reproducible.
Whether your workspace is local or on the cloud, you can access it using different IDEs and environments. It also gives you support for multiple providers and extensions, also you can create your own custom provider if none already meets your need.
Devcontainer.json
The devcontainer.json is a file where all your configuration lives. Either you can create this file manually or DevPod will automatically create it for you with all the required metadata and settings.
The metadata and settings allow you to define the behaviour of the container, tooling, runtime, and dependencies.
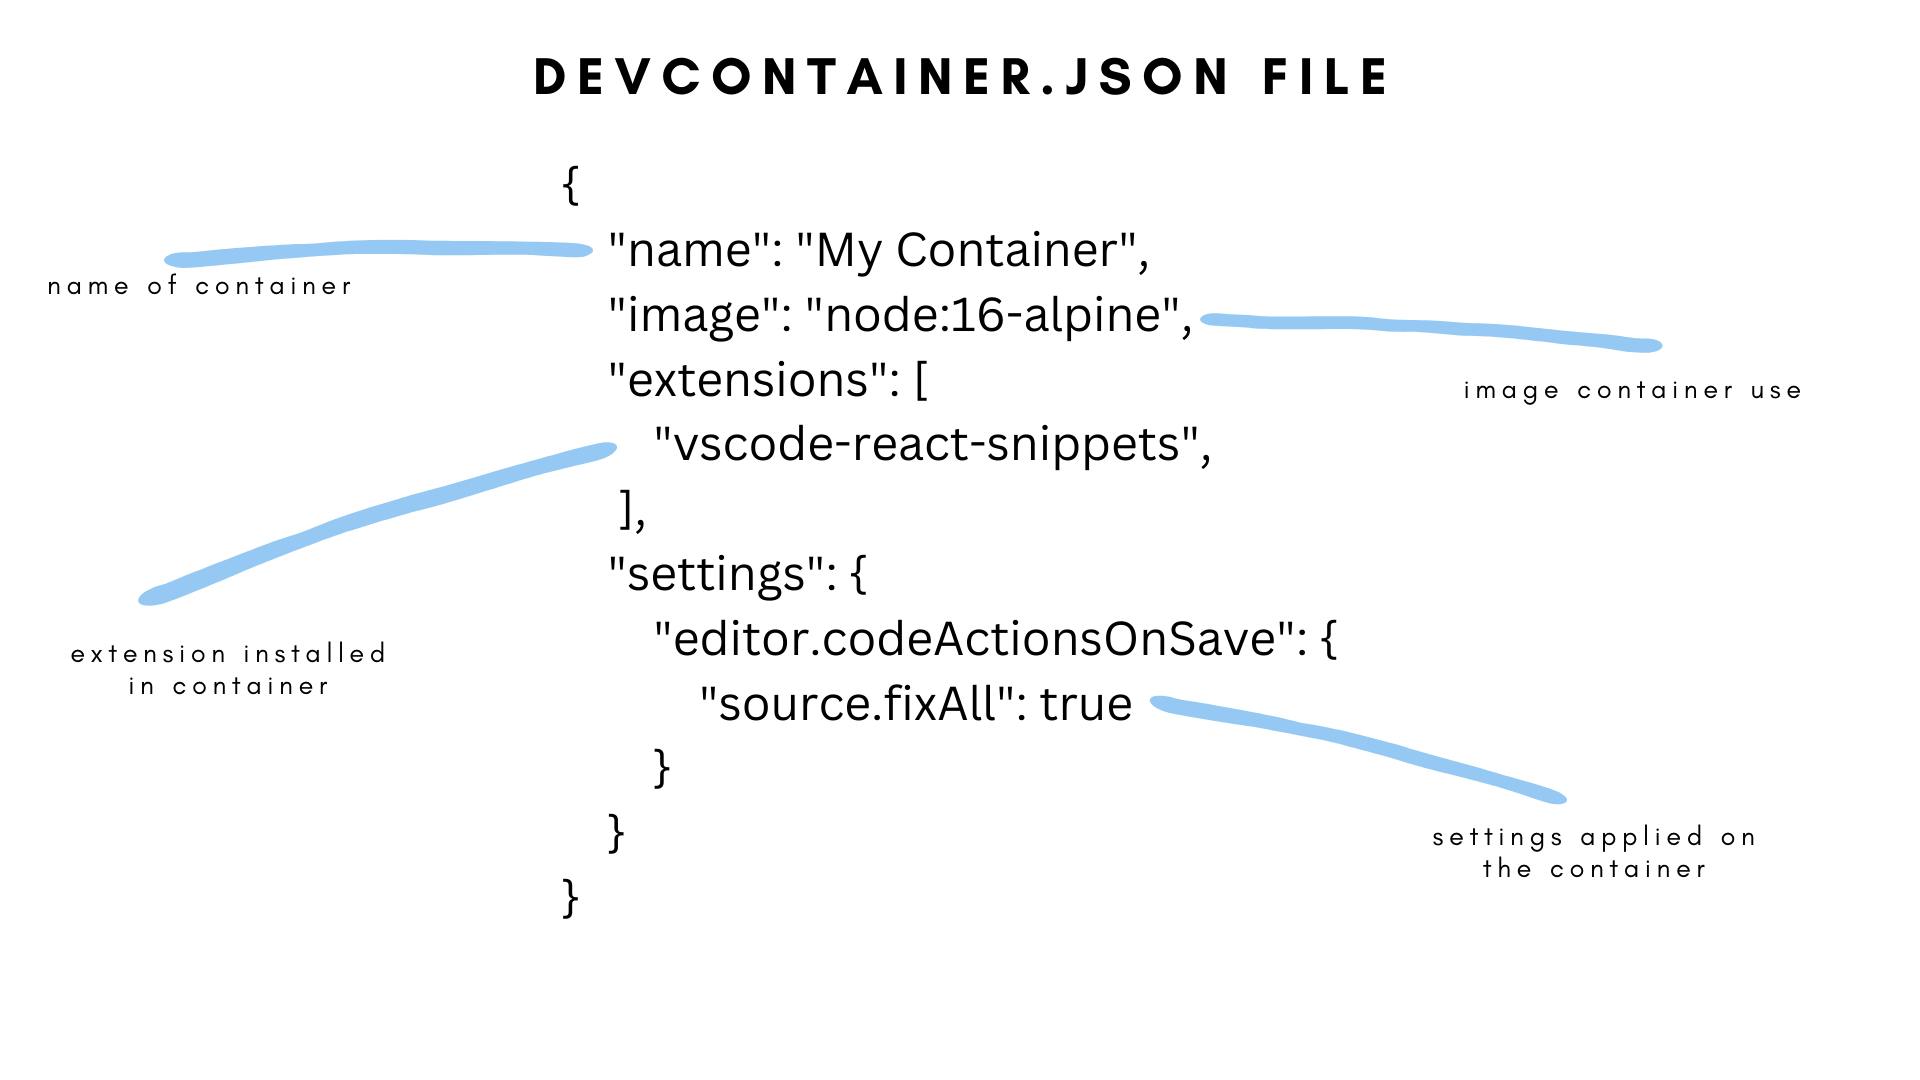
The devcontaier.json file contains various information such as:
The name of the dev container.
The image that the container use.
The Extensions that should be installed in the container.
The settings that should be applied to the container.
The file can have more properties than that, you can check the official Dev Container metadata reference guide - here.
Below is a simple example of how a dev container file looks like:
You can use the --devcontainer-path CLI flag to specify the path to a devcontainer file that is not in the current directory (is in a separate location).
You can also use a Dockerfile by adding the following in your devcontainer:
{
  "build": {
    "dockerfile": "Dockerfile"
  },
  ...
}
After adding this, you can start writing in your Dockerfile and you are good to go.
Installing DevPod
For all the CLI lovers you can use the following command to install DevPod:
curl -L -o devpod "https://github.com/loft-sh/devpod/releases/latest/download/devpod-linux-amd64" && sudo install -c -m 0755 devpod /usr/local/bin && rm -f devpod
Other installation methods - here.
To download the desktop application - here.
Setting Up Provider
Once you've installed DevPod, the first step is to add a provider. In this article, I'll show you how to add Docker as a provider.
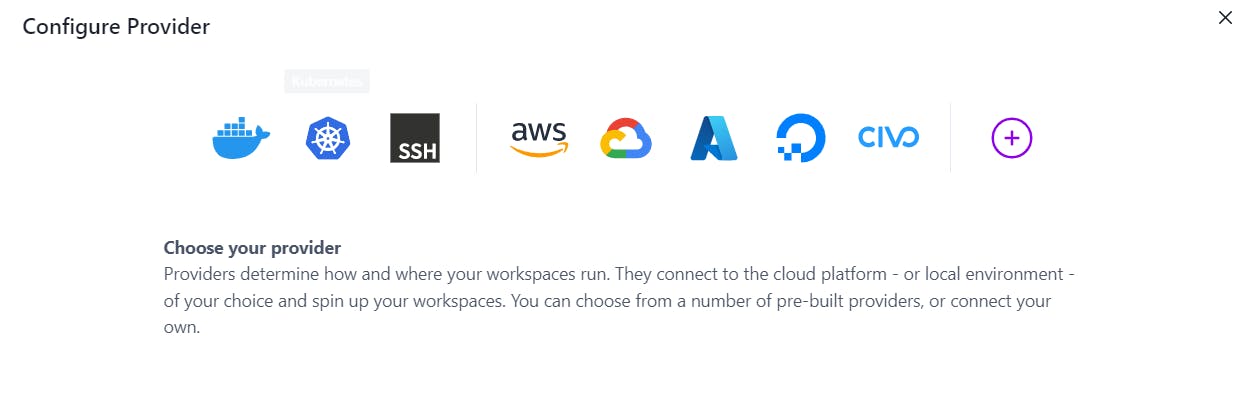
Above is the UI of DevPod from where you can add a provider, in our case docker. But as we are all fans of CLI, I'll show you how to do it the CLI way.
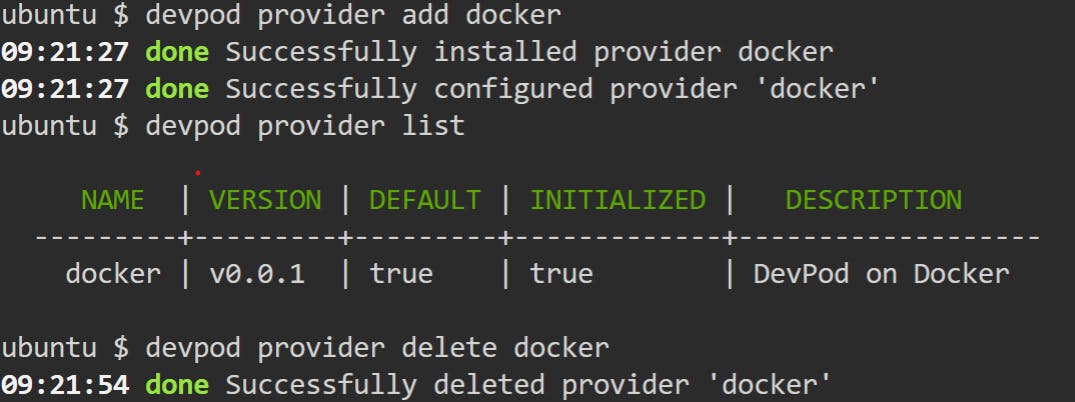
In the first step, I run the devpod provider add docker command, it adds docker as a provider.
Then to verify, I run the devpod provider list command to see whether docker has been installed as a provider or not.
Now if you want to remove the docker provider you can run the devpod provider delete docker command. This will delete the Docker provider.
Creating A workspace
After adding the provider, you can now create your first workspace using either the user interface or the lovely CLI.
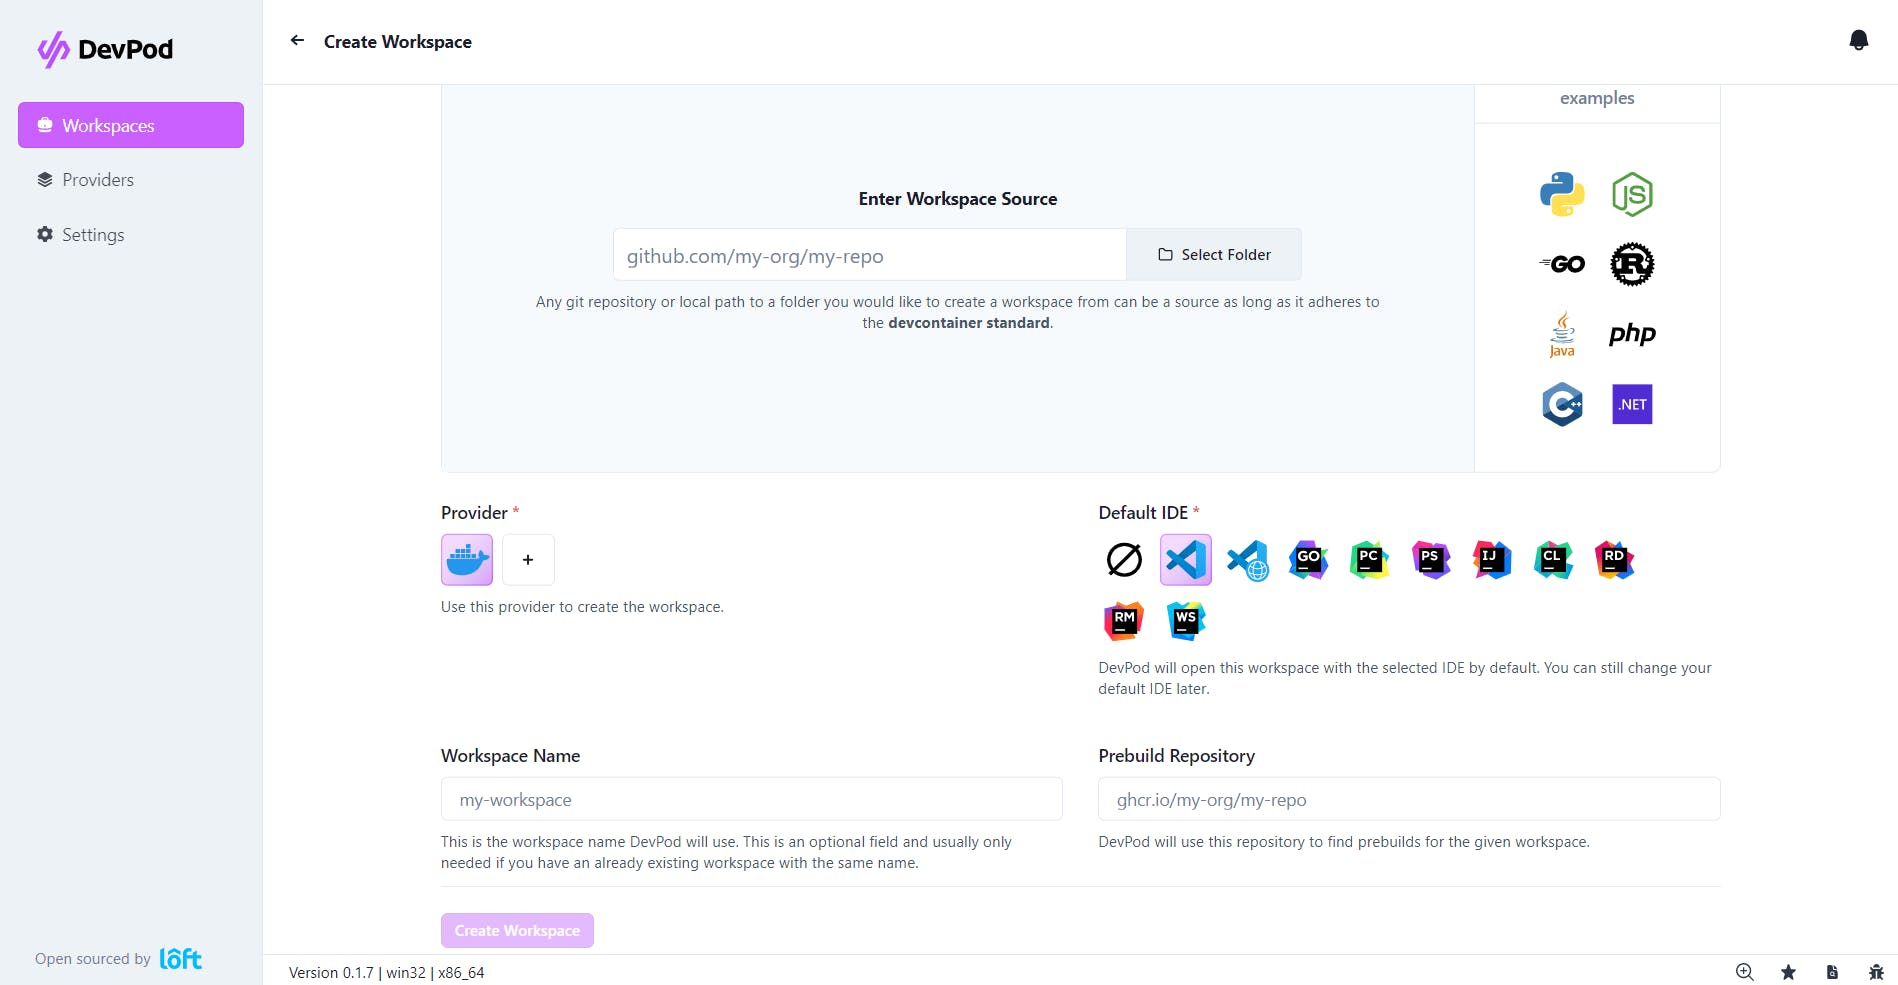
You can see that we have docker as a provider and the option to choose an IDE of our choice. You can add the path to your source repo and create the workspace.
Now let's jump into how to do it the CLI way.
Using the command devpod up source_path DevpPod will create a workspace using the default provider we set up earlier. After creating the workspace, you can also ssh into the workspace using the devpod ssh command and select the required workspace.
To see a list of all available workspaces, you can simply use devpod list command.
That's A Wrap
In this article, I provided an overview of DevPod, including its definition and the step-by-step process for setting up a provider and creating a workspace. Furthermore, I also shared the advantages of DevPod over GitHub Codespaces.
I hope that you found this article informative. If you have any suggestions or questions, please leave a comment.
Connect with me on Twitter if you want to have a chat :>